Interactive Voice Response (IVR)
Set up your environment and choose from various IVR templates to get started implementing the IVR that best suits your use case.
FreeClimb’s Interactive Voice Response (IVR) feature allows for automated interactions between FreeClimb and the caller where the caller responds with voice and/or DTMF (e.g. keypad) input. For a more in-depth introduction to IVRs, please read our IVRs guide.
This how-to guide offers five variations of an IVR application:
- Call routing Using Keypad Input
- Call routing Using Voice Input
- Self Service Using Keypad Input
- Self Service Using Text-to-Speech
- Self Service Using Audio Files
After following the set up instructions below, feel free to jump to whichever variation best suits your interest.
You're ready for this how-to guide if you have the following:A FreeClimb account
A registered application with a named alias
A configured FreeClimb number
Your language and tools:
Step 1: Make your server locally accessible
The fastest way to start testing your FreeClimb application is to temporarily make your local server publicly accessible through a tunneling service. We'll use ngrok to do this.
Once you have downloaded ngrok and unzipped the file to install it, open your terminal and navigate to the directory where you've unzipped ngrok. Use the following command to start a HTTP tunnel on port 3000:
ngrok http 3000Once you run ngrok using the above command, you should receive a response with a public URL that looks something like this:
ngrok by @inconshreveable

Tunnel Status online
Version 2.0/2.0
Web Interface http://127.0.0.1:4040
Forwarding http://92832de0.ngrok.io -> localhost:3000
Forwarding https://92832de0.ngrok.io -> localhost:3000

Connnections ttl opn rt1 rt5 p50 p90
0 0 0.00 0.00 0.00 0.00
The forwarding URLs provided point to your local server. Save the URLs and move on to the next step.
Step 2: Configure your application's endpoints
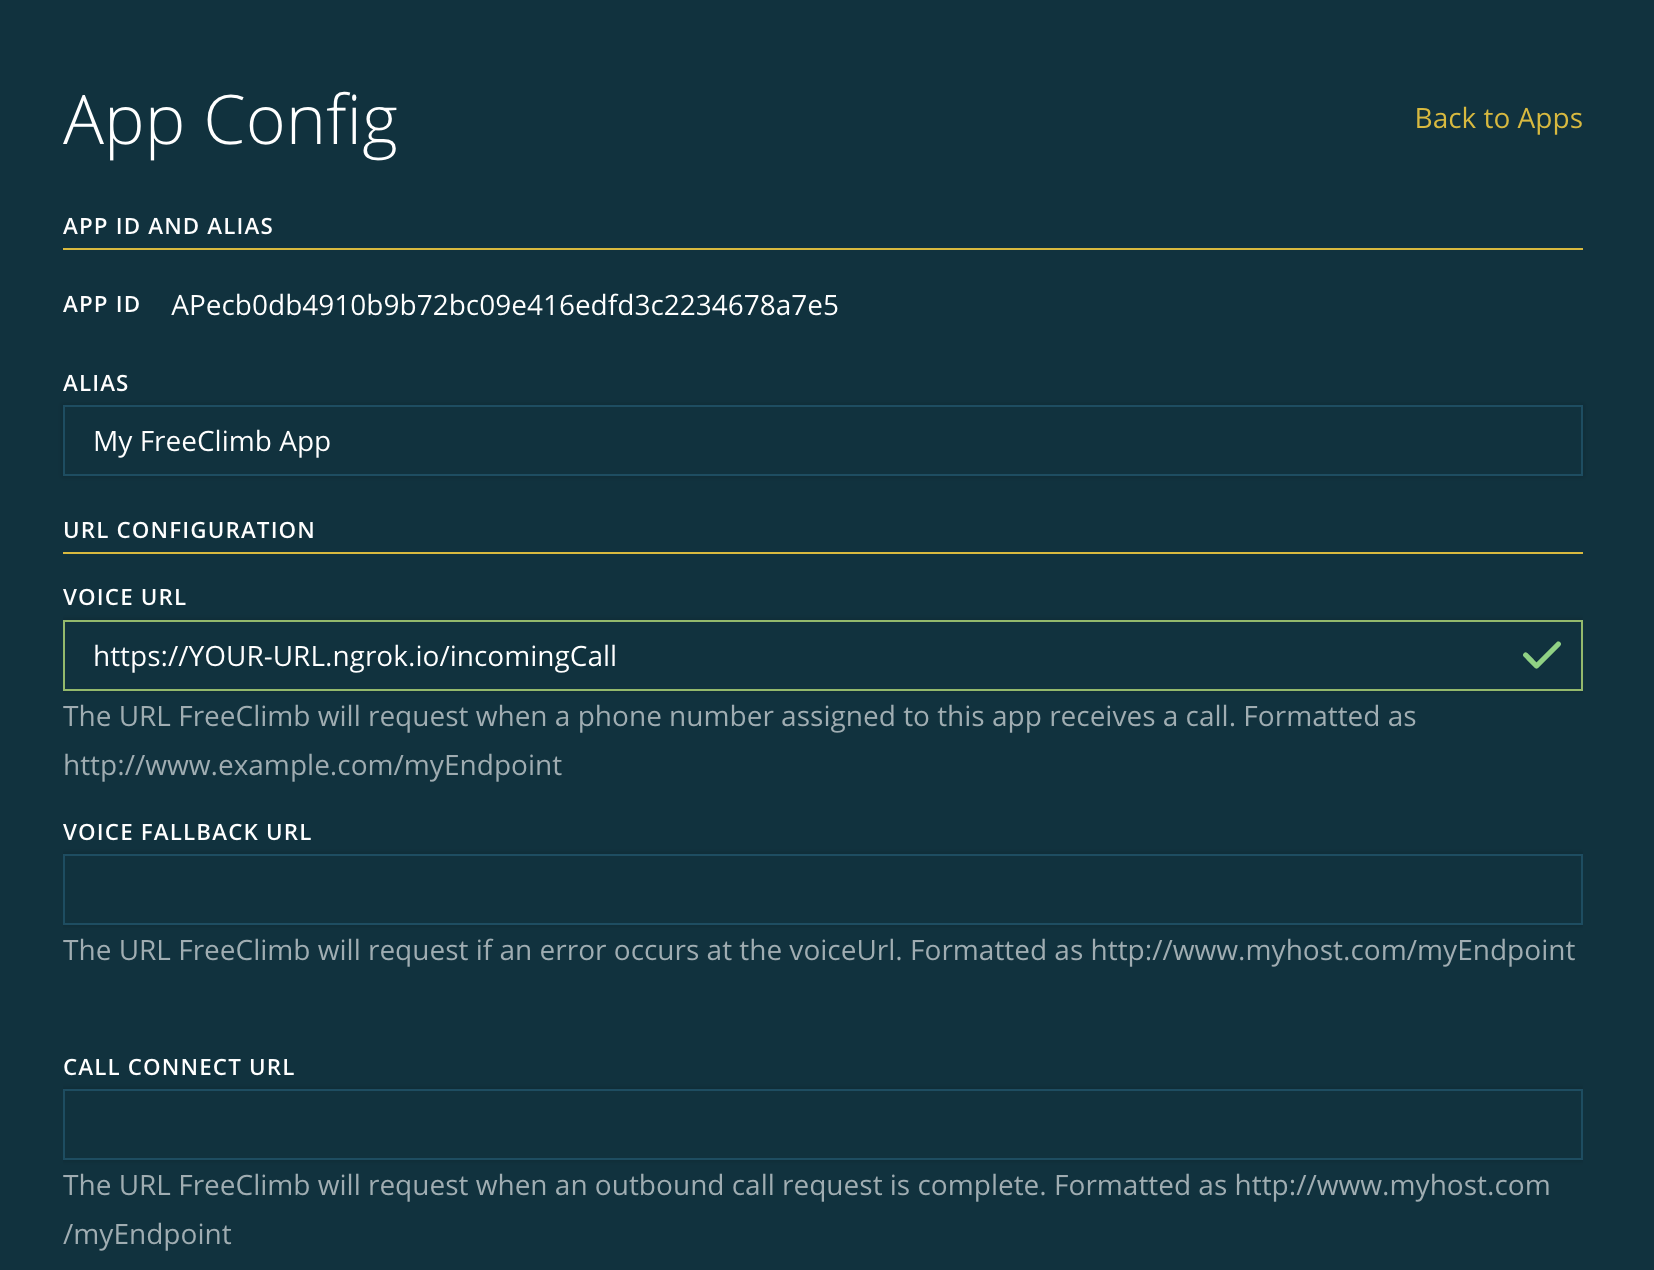
Now that you've got a public URL, you're ready to configure your application's endpoints. We'll be configuring the voiceUrl using your ngrok URL and the route reference /incomingCall.
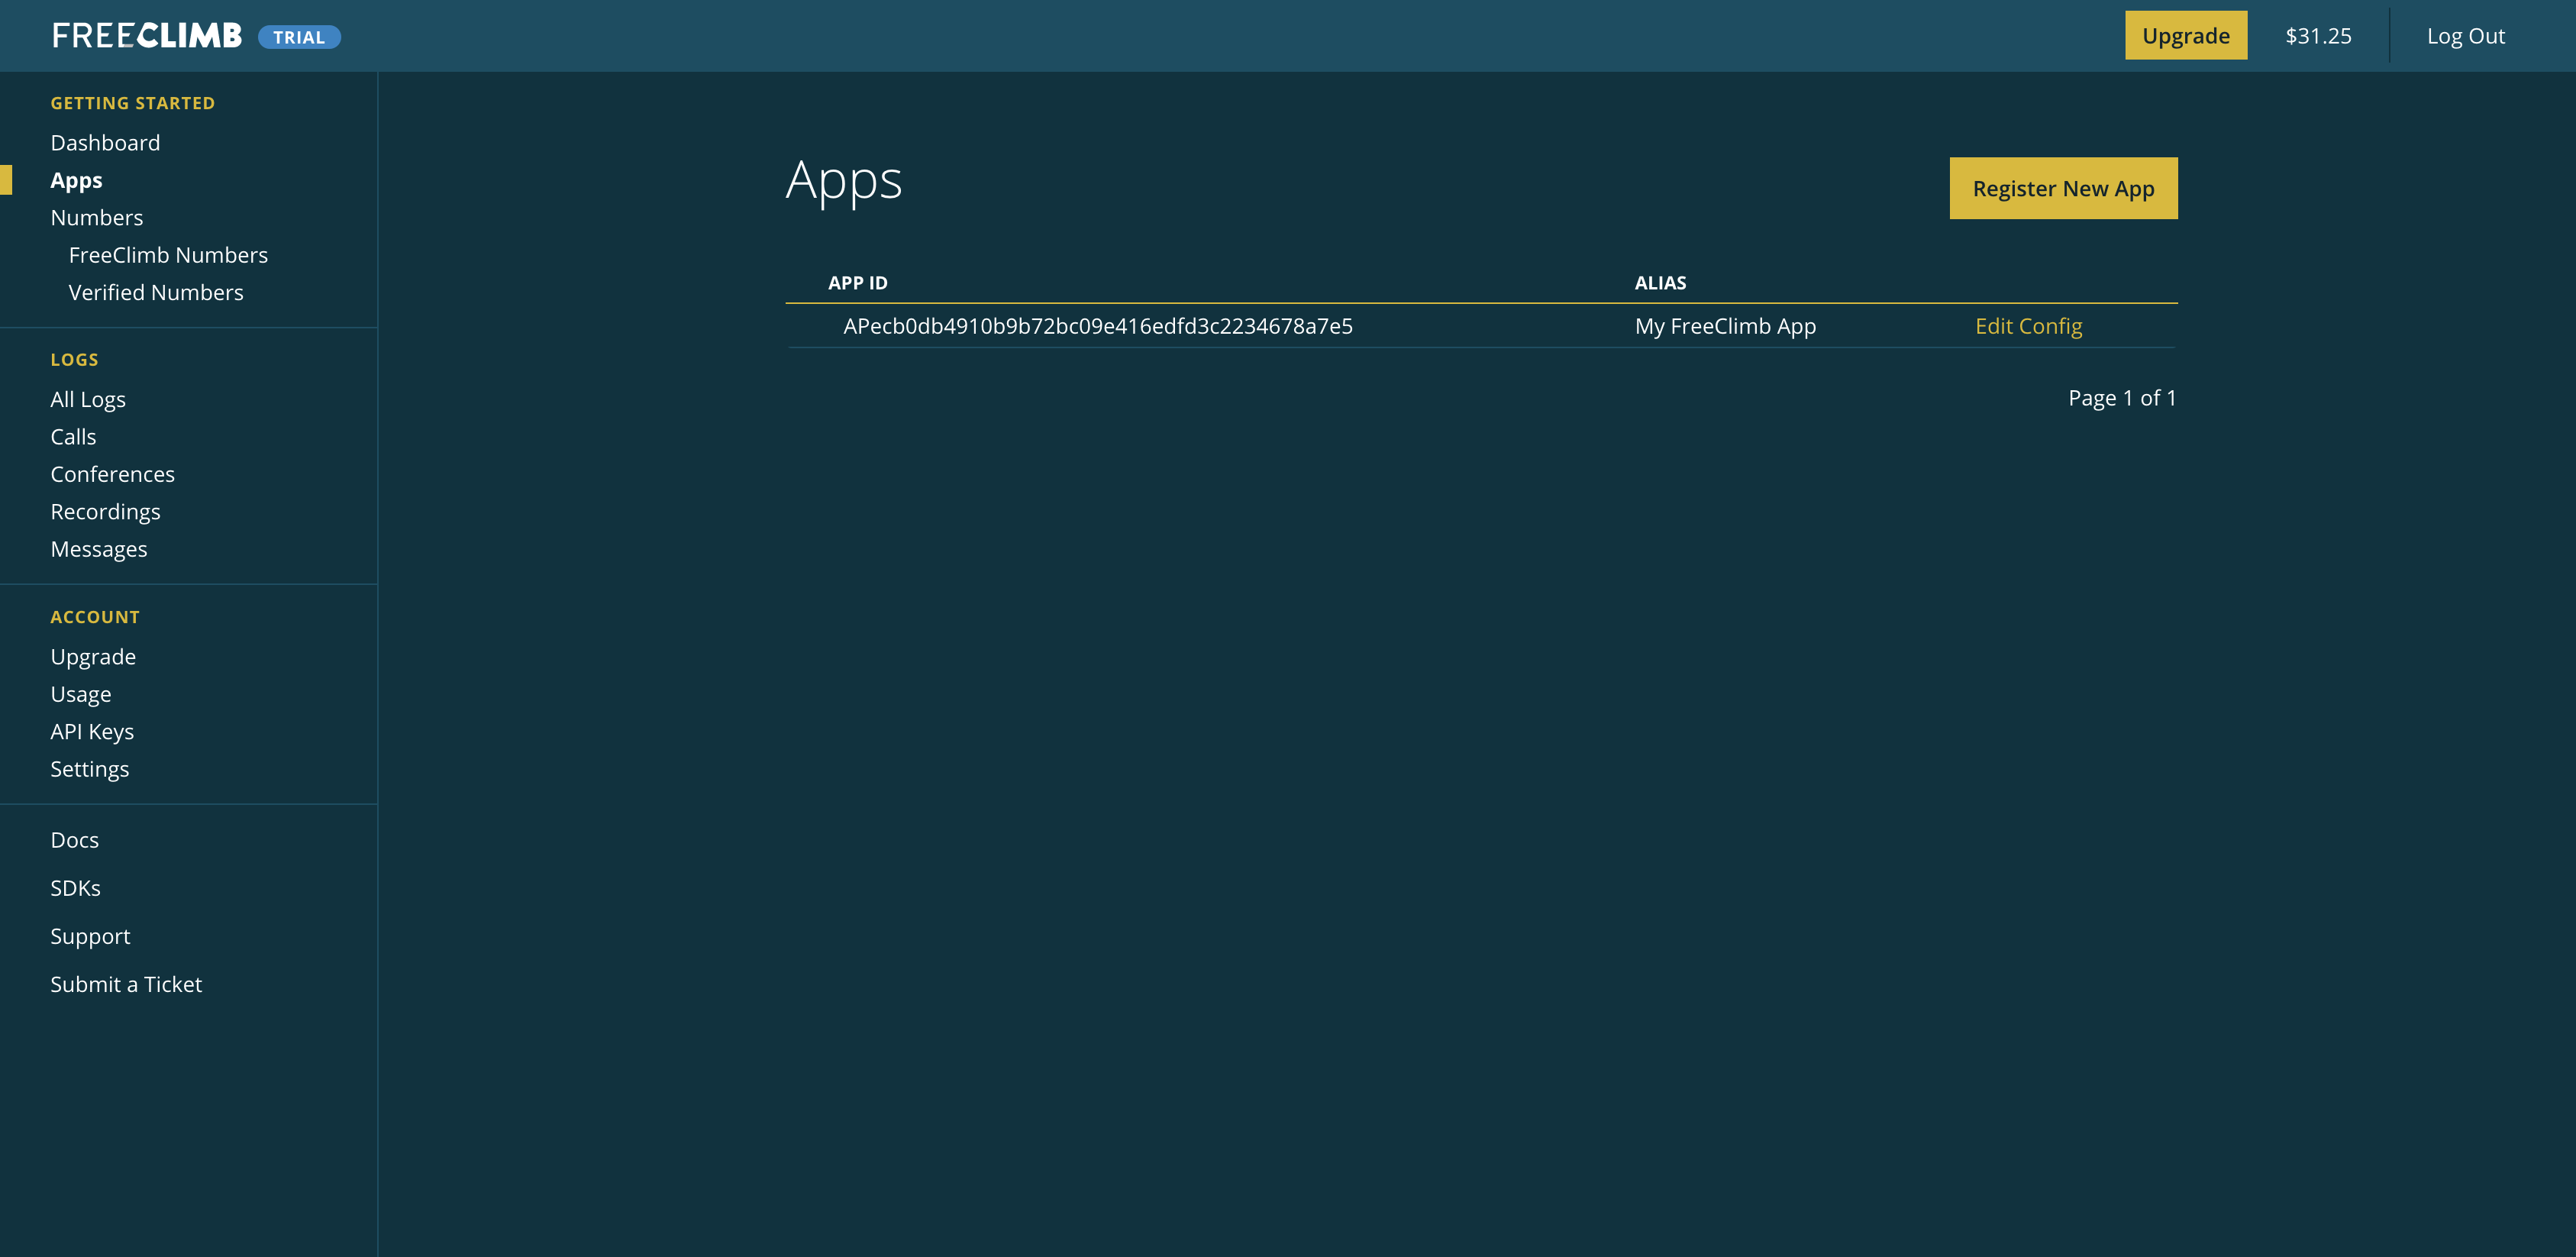
Go to the Apps page in your dashboard. You should see your registered FreeClimb app.

Your Apps page with a registered app.
Click Edit Config to enter the ngrok Forwarding URL to your registered app's voiceUrl field and add the route /incomingCall to the end of it. When you're done, the App Config should look something like this:

Example of a completed App Config.
Save your updated App Config and proceed with the next steps.
Once you've configured your application's endpoints, don't forget to configure the FreeClimb number you plan to use for your IVR sample app.
Step 3: Get dependencies
To start, create a new directory for the project. Within this directory create a file named package.json and add the following content:
{
  "name": "Node_IVR_Sample_Base",
  "version": "1.0.0",
  "description": "Base for FreeClimb Node-SDK sample IVR applications",
  "main": "index.js",
  "license": "MIT",
  "dependencies": {
    "@freeclimb/sdk": "^3.0.1",
    "body-parser": "^1.19.0",
    "dotenv": "^8.2.0",
    "dotenv-safe": "^8.2.0",
    "express": "^4.17.1"
  },
  "devDependencies": {
    "husky": "^4.3.8",
    "jest": "^26.6.3",
    "prettier": "^2.2.1",
    "prettier-standard": "^16.4.1",
    "supertest": "^6.1.3"
  },
  "scripts": {
    "test": "jest",
    "test:cov": "jest --coverage",
    "start": "DEBUG=express:* node .",
    "format": "prettier-standard --format",
    "lint": "prettier-standard --format --check"
  },
  "husky": {
    "hooks": {
      "pre-commit": "lint-staged"
    }
  },
  "lint-staged": {
    "*.{js,jsx,ts,tsx,json,css,scss,md}": [
      "prettier-standard --staged",
      "git add"
    ]
  }
}
}
These dependencies can be installed from the command line by using the following command:
yarn installStep 4: Set environment variables
In order to authenticate your requests with the FreeClimb platform, we need to include your API credentials (account ID and API key) in every request. Your account ID and API key can be found in the FreeClimb dashboard.
Why put API credentials in environment variables?If you were to push your code to a public repository, those credentials would be public and an attacker could steal your account. To prevent this we create environment variables with your API credentials and import them into your code using dotenv-safe.
This sample app uses dotenv-safe to read in your credentials, and anything else you save, as environment variables. As required by dotenv-safe, before creating our .env file we must create a .env.example file that outlines the environment variables that will need to be present in the actual .env file.
You must include both a
.env.examplefile and a.envfile in order for dotenv-safe to work properly.
To do so, create a file in your project's directory named .env.example and add the following content:
ACCOUNT_ID=
API_KEY=
HOST=
PORT=
Once you've created your .env.example file, create a .env file in the root directory of your repo. Make sure to add the file to your .gitignore file. Add your account ID and API key to your .env file.
We'll also include both the host and port where the application should run.
If you've set up ngrok to expose a specific port from your local machine, use the public facing link provided by ngrok as your HOST variable.
The port number will allow you to specify the port on which the app will run. For example, if you were to enter PORT=3000 to view the app, you would direct your browser to http://localhost:3000.
Your .env file should look as follows:
ACCOUNT_ID="YOUR-ACCOUNT-TOKEN"
API_KEY="YOUR-API-KEY"
HOST="YOUR-HOST"
PORT="YOUR-PORT-NUMBER"
Save your files and continue to the next step.
Step 5: Choose your IVR type
Our IVR how-to guide offers step-by-step instructions for different IVR uses cases that best suit your needs. Feel free to try them all or jump to your preferred IVR sample app in the list below:
- Call Routing Using Keypad Input
- Call Routing Using Voice Input
- Self Service Using Keypad Input
- Self Service Using Text-to-Speech
- Self Service Using Audio Files
Updated 8 months ago