Java Messaging Quickstart
Objective: Build a simple Java application that receives a message and sends a reply.
Step 1: Create a FreeClimb account
- Go to the FreeClimb create an account page and sign up for an account using either your business email or GitHub account.
- After signing up, you’ll be prompted to verify your email and phone number (US only). You’ll receive an SMS confirmation code.
- Enter the confirmation code, and you will be taken to your FreeClimb dashboard. Here, you can manage your account, add applications, configure phone settings, and review call logs.
- Click on FreeClimb Numbers in the left sidebar. You will see your free FreeClimb number that comes with the trial account. This number has been automatically attached to “My FreeClimb Application.” You are now ready to move on to Step 2.
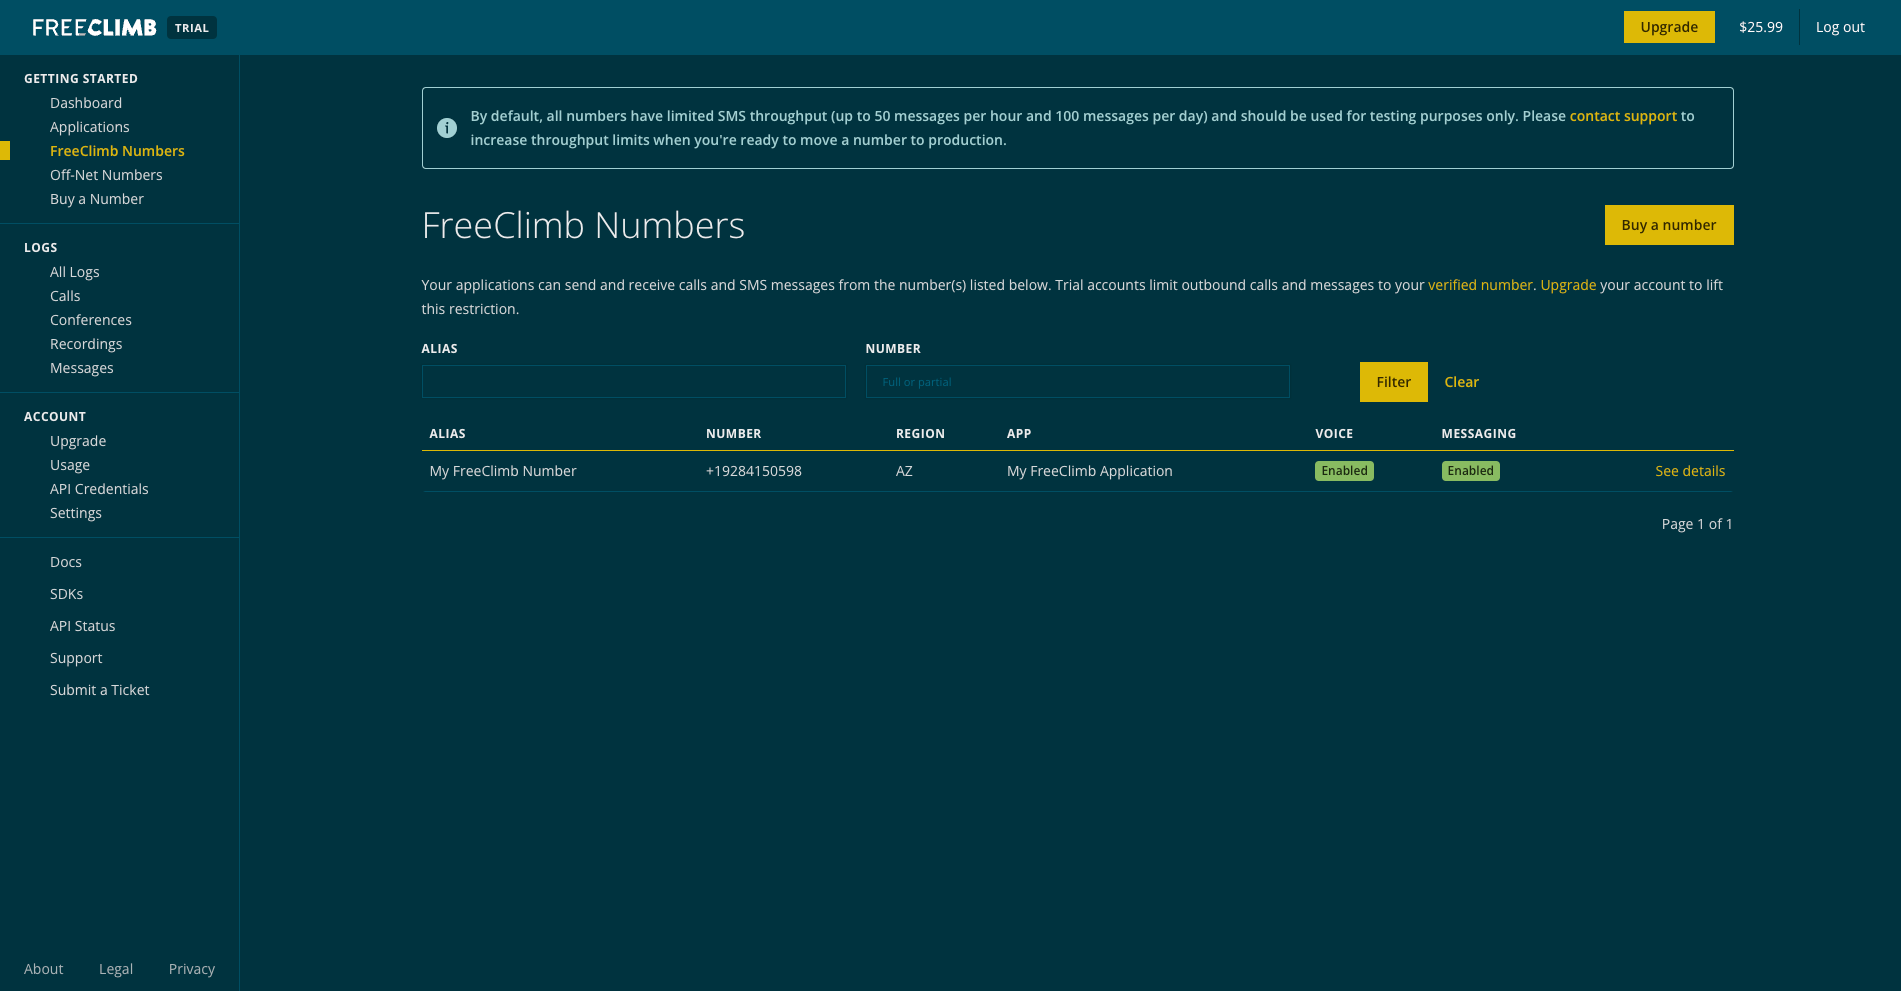
What is my FreeClimb number?FreeClimb numbers are regular phone numbers that you can dial from any mobile or landline phone. When a call is received, FreeClimb picks it up for you and forwards it to an application.
FreeClimb applications are the interface between your code and the FreeClimb backend, which handles the transmission of data between the Internet and telephone networks. FreeClimb will connect your App ID to a FreeClimb telephone number so that it can correctly direct incoming and outgoing voice data
Step 2: Create a java application to receive and send a message
Clone your quickstart
- For this quickstart, clone the repository for Java Messaging Quickstart using GitHub's interface or git in the command line.
git clone https://github.com/FreeClimbAPI/Java-Receive-Message-Tutorial.gitAdd your credentials to your project
Now that you've cloned the repo for your sample app, the next step is to add your API credentials so you can authenticate with FreeClimb.
- Copy your account ID and API key from your dashboard homepage.

Your API credentials can be copied from your Dashboard homepage.
- Edit the .env.sample file and save as .env. Make sure to add the file to your .gitignore file.
- Add your account ID, FreeClimb number (be sure to remove special characters), and API key to your .env file, and save the file. Your .env file should look something like this:
ACCOUNT_ID=YOUR-ACCOUNT-TOKEN
API_KEY=YOUR-API-KEY
FREECLIMB_NUMBER=YOUR-FREECLIMB-NUMBER
The quickstart uses dotenv to read in your credentials, and anything else you save, as environment variables.
Make your local server publicly accessible
The fastest way to start testing your FreeClimb application is to temporarily make your local server publicly accessible through a tunneling service. We'll use ngrok to do this.
- Start by downloading ngrok.
- Unzip the file to install.
- Open your terminal and navigate to the directory where you've unzipped ngrok.
- Use the following command to start a HTTP tunnel on port 3000:
ngrok http 3000
Heads Up
- Running this command without an ngrok account will result in an error.
- Ensure ngrok is included in your $PATH variable.
Once you run ngrok you should receive a response with a public URL, that looks something like this:
ngrok by @inconshreveable

Tunnel Status                 online
Version                       2.0/2.0
Web Interface                 http://127.0.0.1:4040
Forwarding                    http://92832de0.ngrok.io -> localhost:3000
Forwarding                    https://92832de0.ngrok.io -> localhost:3000

Connnections                  ttl     opn     rt1     rt5     p50     p90
0 0 0.00 0.00 0.00 0.00- The Forwarding URLs point to your local server. Save the URLs and go on to the next step.
Step 3: Connect your java application to FreeClimb
Now that you've got a public URL you're ready to configure your application's endpoints. We'll be configuring the smsUrl using your ngrok URL and the route reference /incomingSms.
- Go to the Apps page in your dashboard. You should see your registered FreeClimb app..

Your Apps page with your registered app
- Open its App Config, and you'll see its application ID, alias, and some options for URL configuration. Enter your ngrok URL into the smsUrl field, and add the route
/incomingSmsat the end of the URL.
https://YOUR-URL.ngrok.io/incomingSmsWhen you're done the App Config should look something like this:

Example of a completed App Config.
- Save your updated App Config.
Step 4: Test your application
Once you've updated your App Config you're all ready to run your app.
- Run the quickstart application with the command:
yarn install
yarn start
Using Docker instead?Follow these instructions:
- Pull docker image from dockerhub
docker pull freeclimbapi/node-sms-quickstart
- Run docker image after replacing placeholder values
docker run -e ACCOUNT_ID=<YOUR_ACCOUNT_ID> -e API_KEY=<YOUR_API_KEY> -e FREECLIMB_NUMBER=<YOUR_FREECLIMB_NUMBER> -p 3000:3000 freeclimbapi/node-sms-quickstart
- Once the quickstart app is running, use your verified number to send a message to your configured FreeClimb number. If everything is set up right, you should receive the message, "Hello, World!" Congratulations! You've just made your first messaging application.
If you did not receive this message, confirm the following:
- You sent the message from your verified number to the configured FreeClimb number.
- Your FreeClimb Number is connected to My FreeClimb Application.
- The SMS URL in your app config is the correct public URL and contains
/incomingSmson the end.
Need additional help?Please reach out to our support team.
Next steps
For a more detailed explanation of the code used, see our Receive a Message how-to guide.